CoPAS Guide
In the following section, you will find everything you need to know about working with CoPAS.
Registry (Marketplace) Management
CoPAS Marketplaces are registries that contain a list of CoPAS modules that are available for download. You can add multiple registries through CoPAS CLI. For more information, visit CoPAS Marketplaces.
Adding Registries
To add a registry, you can use copas registry add. When prompted for which type of registry to add, select the registry type and press enter. For example, if you want to add the forensics registry, select harbor:
$ copas registry add
[?] Which type of docker registry would you like to add?: harbor
   default
 ❯ harbor
When prompted for the URL of the registry, enter the URL of the registry and press enter:
[?] Server url: https://copas-market.cerit-sc.czFinally, when prompted for the Harbor project, enter the project name and press enter:
[?] Harbor project: forensics
Registry "https://copas-market.cerit-sc.cz/forensics" successfully added$ copas registry list
REGISTRIES (CoPAS MARKETPLACES)
----------------------------------------------------------------------------
Url Status
----------------------------------------------------------------------------
https://copas-market.cerit-sc.cz/forensics AvailableThis will list all added registries and their status. If the status is available, you can use the registry to download CoPAS modules.
Removing Registries
To remove a registry, use copas registry remove:
$ copas registry remove
Registry "https://copas-market.cerit-sc.cz/forensics" successfully removed
This will automatically remove the only available registry or prompt you to select a registry to remove if there are multiple registries. You can also be explicit and use copas registry remove <registry-url>/<registry-project> to remove a specific registry. For example, to remove the forensics registry, use copas registry remove https://copas-market.cerit-sc.cz/forensics:
$ copas registry remove https://copas-market.cerit-sc.cz/forensics
Registry "https://copas-market.cerit-sc.cz/forensics" successfully removed
Module Management
Listing Available Modules
Once you have successfully added at least one registry and its status is available, you can list all available CoPAS modules in added registries by using copas module avail:
$ copas module avail
https://copas-market.cerit-sc.cz/forensics
  likpik               1.0.0                        LikPik, module for analyzing data leaks
  arkime               4.2.0                        Arkime for PCAP analysis
  pcap-elk             0.1, 8.6.0                   heh
  filesystem-fimetis   0.2, 0.1                     The Fimetis tool enables the examination of file system metadata.
  csv-elk              2.2, 8.6.0                   heh
  knime                1.0, 9.1.2                   KNIME application
  notepad              1.0, 8.5.4                   Notepad++ application
  tor                  1.1, 12.5.1                  Tor Browser application
  desktop-linux-win    1.1, 1.0                     Module template for Windows Apps
  desktop-linux        0.0.2, 1.0                   Module template for Linux Apps
You can now see the list of all available modules in all added registries. To get more information about a specific module, you can use copas module info <module-name>. For example, to get more information about the csv-elk` module, use copas module info csv-elk:
$ copas module info csv-elk
Author: <author information>
Description: <module description>

Available:
<available versions>
Adding Modules
Once you have decided which module you want to use, you can download it by using copas module add <module-name>. For example, to download the csv-elk module from forensics registry, use copas module add csv-elk:
$ copas module add csv-elk
Adding module "csv-elk:2.2"
2.2: Pulling from forensics/csv-elk
CoPAS will automatically download the latest version of the module. If you want to download a specific version, use copas module add <module-name>:<version>:
$ copas module add csv-elk:2.2
Adding module "csv-elk:2.2"
8.6.0: Pulling from forensics/csv-elk
You can also load a module from a tar image file by using copas module load <path-to-image-file>:
$ copas module load csv-elk-image.tar
Loading Copas module from the provided file "csv-elk-image.tar" ... DONE$ copas module list
ADDED MODULES
----------------------------------------------------------------
Name Version
----------------------------------------------------------------
csv-elk 2.2You can see that the csv-elk module is listed as the only added module and its version is 2.2.
Upgrading Modules
CoPAS modules are constantly being updated. To upgrade all modules to their latest version,
use copas module upgrade:
$ copas module upgrade
Updating module csv-elk from 2.1 to 2.2 (from https://copas-market.cerit-sc.cz/forensics)
Adding module "csv-elk:2.2"
2.2: Pulling from forensics/csv-elk
91a32b415fc9: Pull complete
Digest: ...
Status: Downloaded newer image for copas-market.cerit-sc.cz/forensics/csv-elk:2.2
copas-market.cerit-sc.cz/forensics/csv-elk:2.2
DONE
Removing module "csv-elk:2.1" ... DONE
Module csv-elk successfully updated
Removing Modules
To remove a specific module, you can use copas module remove <module-name>. For example, to remove the csv-elk module:
$ copas module remove csv-elk
Removing module "csv-elk:2.2" ... DONE
This will remove all versions of the module. If you want to remove a specific version of the module, use copas module remove <module-name>:<version>:
$ copas module remove csv-elk:2.2
Removing module "csv-elk:2.2" ... DONE
You can also remove all added modules by using copas module purge:
$ copas module purge
Removing module "csv-elk:2.2" ... DONE
Container Management
To use CoPAS modules, you need to first create containers from them. Containers are isolated environments that contain all the necessary tools and services to run the module.
Creating Containers
If you want to create a container from a module, use copas create. You will be prompted to select a module to use and to enter a name for the container. For example, to create a container named csv from the csv-elk module:
$ copas create
[?] Which module?: csv-elk
 ❯ csv-elk

No container name provided.
[?] How would you like to name the container?: choose
 ❯ choose
   generate

Container name: csv
Or you can be explicit and use copas create <container-name> -m <module-name>:
$ copas create csv -m csv-elk
Creating datastore /opt/copas/containers/csv/data ... DONE
Creating container ... DONE
Container successfully created and given name "csv"
A container named csv was created from the csv-elk module. You can also load a container from an image file by using copas load <path-to-container-file>:
$ copas load csv-container.tar
You are about to load the following container:
        Container name:   csv
                Module:   csv-elk:2.2
            Image file:   csv-2023-12-14-image.tar
         Creation date:   2023-12-14
            Created by:   root
               On host:   localhost
[?] Would you like to continue? (y/N): y

Importing the container image ... DONE
[?] How would you like to name the container?: choose
 ❯ choose
   generate

Container name: csv
Creating datastore /opt/copas/containers/csv/data ... DONE
Creating container ... DONE
Container successfully added and given name "csv"
Removing imported image ... DONE
Additionally, you can specify the data file to be loaded into the container by using copas load <path-to-container-file> <path-to-data-file>:
$ copas load csv-container.tar data
...$ copas list
CONTAINERS
--------------------------------------------------------------------------------------------------------------
Name Module Url State
--------------------------------------------------------------------------------------------------------------
csv csv-elk:2.2 http://localhost:7000 stoppedYou can see one container named csv that was created from the csv-elk module. The container should be stopped.
Starting Containers
To start the container, use copas start:
$ copas start
There is only one stopped container: csv. Picking it.
Starting container "csv" ... DONE
URL: http://localhost:7000
This will automatically start the only stopped container or prompt you to select a container to start if there are multiple stopped containers. You can also be explicit and use copas start <container-name>. For example, to start the csv container:
$ copas start csv
Starting container "csv" ... DONE
URL: http://localhost:7000
After the container is started, you are provided with the URL of the container. You can use this URL to access the CoPAS UI and start with the analysis.
Monitoring Containers
If you have running containers, you can get information about them by using copas monitor:
$ copas monitor
Name                                                             CPU %        MEM USAGE    MEM LIMIT    MEM %
csv                                                              0.133%       3.73 GB      14.33 GB     26.03%
Additionally, you can also access a running container by using copas enter:
$ copas enter
There is only one running container: csv. Picking it.
Entering container csv...
This will automatically enter the only running container or prompt you to select a container to enter if there are multiple running containers. You can also be explicit and use copas enter <container-name>. For example, to enter the csv container:
$ copas enter csv
Entering container csv...
Stopping Containers
Once you are done with the analysis, you can stop the container by using copas stop:
$ copas stop
There is only one running container: csv. Picking it.
Stopping the container "csv" ... DONE
This will automatically stop the only running container or prompt you to select a container to stop if there are multiple running containers. You can also be explicit and use copas stop <container-name>`. For example, to stop the csv container:
$ copas stop csv
Stopping the container "csv" ... DONE
Backing Up Containers
If you have stopped containers, you can back them up into a tar archive by using copas backup. You will be prompted to enter a backup name for the container or you can use the default:
$ copas backup
There is only one stopped container: csv. Picking it.
Please, provide the name of your container backup (default "csv-2023-12-04"):
Backing up the container "csv" (WITHOUT data) into the file "csv-2023-12-04-image.tar" ...
Creating temporary image ... DONE
Storing image contents to backup file ... DONE
Removing temporary image ... DONE
This will automatically back up the only available stopped container or prompt you to select a container to back up if there are multiple stopped containers. You can also be explicit and use copas backup <container-name>. For example, to back up the csv container:
$ copas backup csv
...$ copas destroy
There is only one container: csv. Picking it.
WARNING: Container is NOT backed up!
[?] Are you sure you want to destroy "csv"? (y/N):This will automatically try to remove the only stopped container or prompt you to select a container to remove if there are multiple stopped containers. You can also be explicit and use copas destroy <container-name>. For example, to remove the csv container:
$ copas destroy csv
WARNING: Container is NOT backed up!
[?] Are you sure you want to destroy "csv"? (y/N):
You can also remove all stopped containers by using copas purge:
$ copas purge
Removing stopped containers
Removing the container "csv" ... DONE
Removing the container directory with the datastore /opt/copas/containers/csv ... DONE
Working with CoPAS UI
CoPAS UI is configurable and each module can have a different UI. However, some parts of the UI are shared across all modules. This section will give you all the information you need about the shared parts of the UI and how to work with them. For more information about the specific modules, you can check out their documentation in the UI.
Home Page
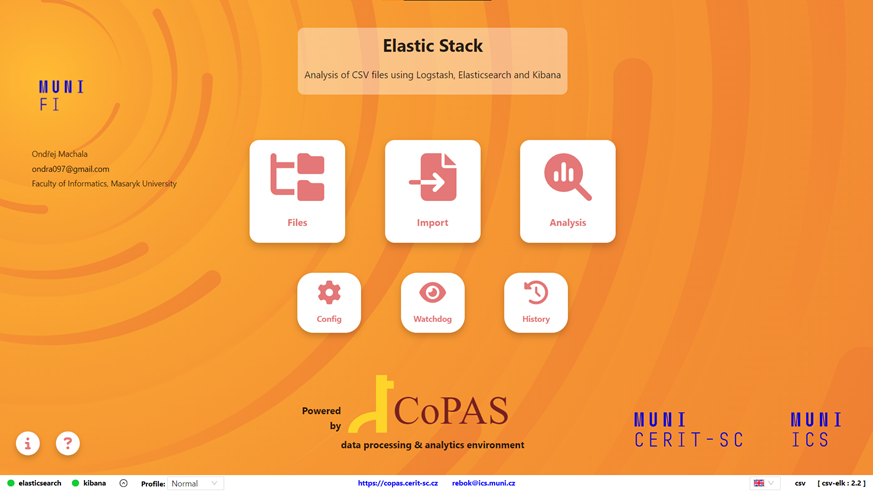
The home page of CoPAS UI serves as the central hub, from where all the functionality is accessible. It is divided into multiple sections and can look a little bit different depending on the module. There are 5 main sections:
- Module Title and Description Section:
- Configurable by the module author.
-
Navigation/Menu Section:
- Three prominent links for essential analysis processes:
- File manager for file uploads.
- Data import to the Analysis API.
- Analysis UI.
- Three less prominent links for:
- Analytical configuration management.
- Watchdog management.
- History of all imports.
- Three prominent links for essential analysis processes:
-
Promotion Sections (Left and Right):
- Configurable sections for promoting the module's author.
- Logos, website links, and email contacts can be provided.
-
Information Section:
- Link for additional information about module authors and CoPAS authors on hover.
- Link to the Help page for learning more about the module.
- Status Bar
Status Bar
The status bar is located at the bottom of the page and is visible on every page of the CoPAS UI. It consists of 4 parts:
1. Service Information:
- Located on the left side of the status bar.
- Indicates the availability of services (green for up, red for down).
- Hovering provides additional service details.

2. Analysis API Actions:
- Positioned to the right of service statuses.
- Defined by the module.
- A popup with available actions for the Analysis API. These serve to update the state of the container - e.g., delete the data of a service, restart the service, or similar.
3. Profile Selection:
- Next to API Actions.
- There is always one active profile, which can be updated using the selection list.
- Profile usually serves for setting the resource consumption by the module, but can be used for other purposes.

4. Additional Details:
- Displayed on the far right.
- Includes the name of the container, the module's name, and its version.
Information about service statuses, available actions, and active profiles is only shown if configured by the module author.
File Manager
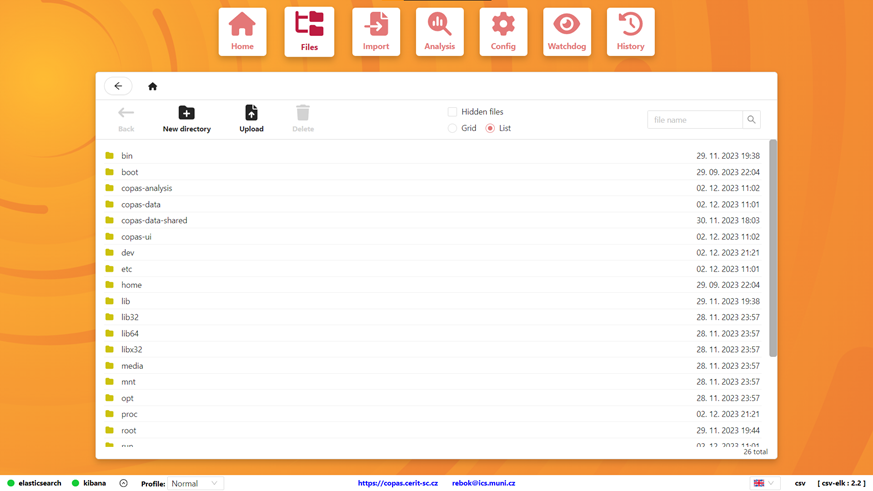
The file manager can be accessed by clicking on the Files icon in the navigation section. It allows you to manage files inside the container. Currently, there is support for:
- uploading files - either upload button or drag and drop
- creating new directories using the new directory button
- deleting files - either the delete button or Del key on the keyboard
- copy/cut files functionality using Ctrl + C/X , Ctrl + V
- searching and filtering files using the search bar
There are two view modes for the contents of directories - list and grid mode. By default hidden files (beginning with a dot) remain hidden, but they can be shown using a radio button option.
Shared Folder
CoPAS containers have a shared folder named shared-data located in the /opt/copas/ directory on Linux machines. On Windows, the folder is located in the \\wsl.localhost\Copas\opt\copas directory. This folder is shared between the host and the container. This means that you can upload files into the container by simply copying them into the shared-data folder on the host. They will be automatically available in the container in the copas-data-shared folder.
Uploading Data Into the Container
CoPAS offers two ways of uploading data into the container. You can either take advantage of the File Manager or use the Shared Folder.
When uploading large amounts of data, we recommend using the Shared Folder approach.
Importing Data for Analysis
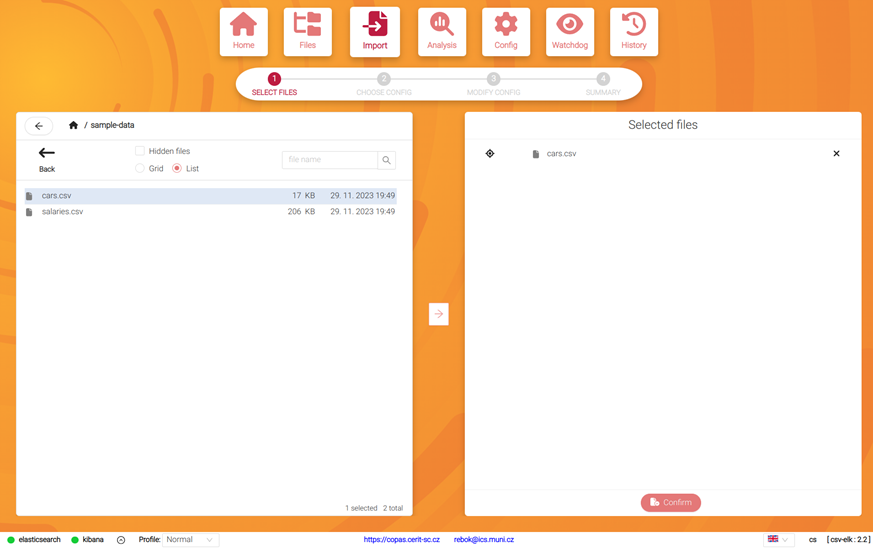
Once you have uploaded data into the container, you can start the import process. To start the import process, click on the Import icon in the navigation section. On the import page, you will encounter four sequential steps.
Step 1: Select Files for Analysis
Firstly, select files, directories, or contents of archives you want to analyze by clicking on the arrow button in the middle of the screen. Directories can be selected for watching which is explained further in the Watching Directories for New Files section. Once you have selected all the desired files, click the Confirm button in the bottom right to continue.
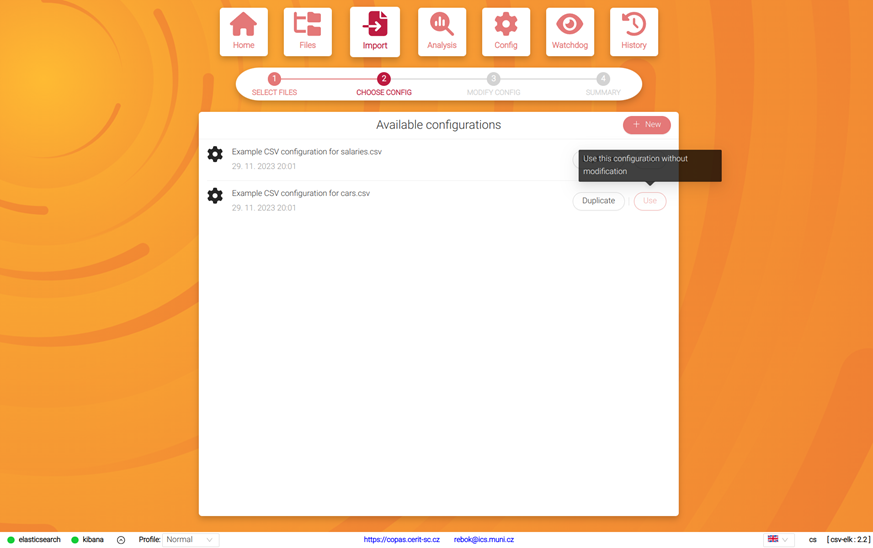
Step 2: Choose Analysis Configuration
Configuration for analysis can be either chosen directly, a new one can be created from scratch, or an existing configuration can be duplicated and modified.
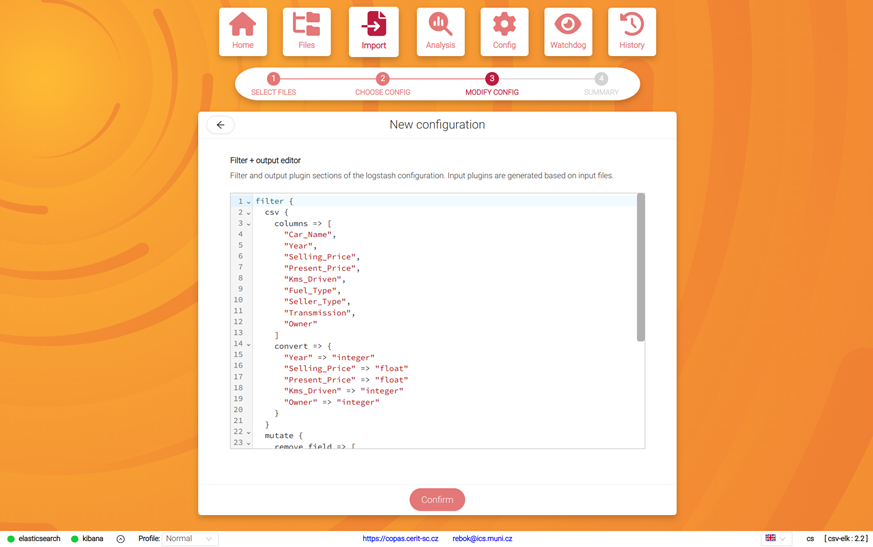
Step 3: Modify or Create Configuration (Optional)
In the third step, modify an existing analytical configuration or create a new one. Additionally, if configured, utilize the support for generating an analytical configuration based on the selected files to streamline the process. Details about a particular set of options for the module are specified in the respective help section.
Step 4: View the Summary and Confirm the Import
A summary of selected files, configuration, and watched directories is displayed. If a new configuration is created or an existing modified, an option to save the configuration is shown, which will happen if the import is successful.
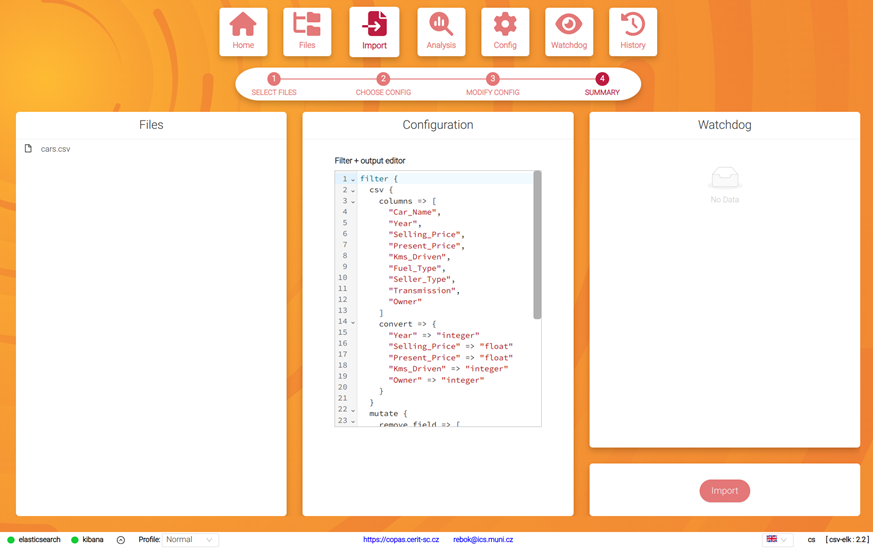
After confirming in the UI, all the files along with the analytical configuration will be sent to the Analysis API for processing. You can check if the import was successful on the History page. Once the import is finished, you can start the analysis by clicking on the Analysis button in the navigation section. This will open the Analysis page, which is different for each module.
Watching Directories for New Files
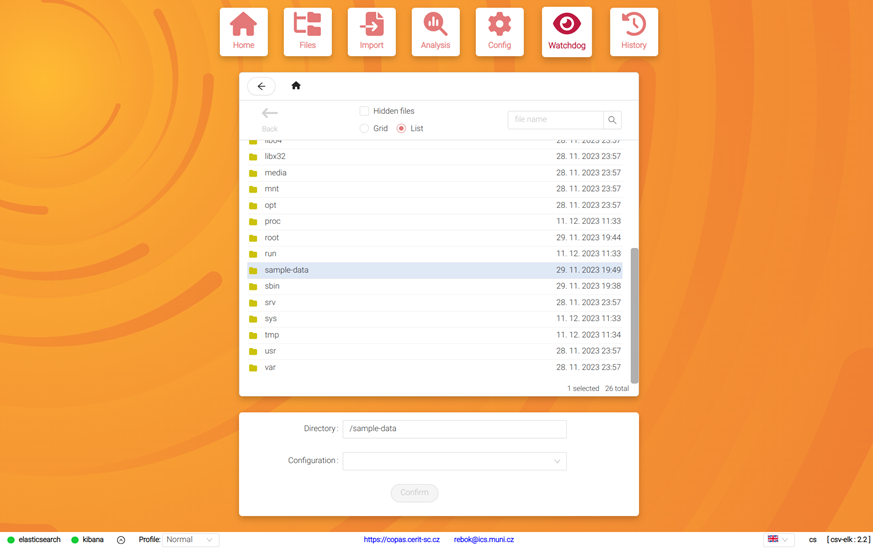
Directories can be selected for watching along with an assigned configuration. A watchdog checks on this directory and its subtree and when a new file appears in the subtree given by the directory, it is automatically imported.
Watchdogs can be either created during import when selecting a directory or separately in its dedicated UI, where all the watched directories can be viewed. To access the dedicated UI, click on the Watchdog icon in the navigation section.
Viewing Import History
To view import history, click on the History icon in the navigation section. The table displays information such as the time of completion, duration of the import process, status (success, failure, importing), origin (manual, watchdog), imported files along with their import status, and the analytical configuration used.
Many of the columns can be filtered or sorted. There is also a search input, which allows filtering through all the imported files.
When the import is in progress, history shows the importing status and the current duration since the start.
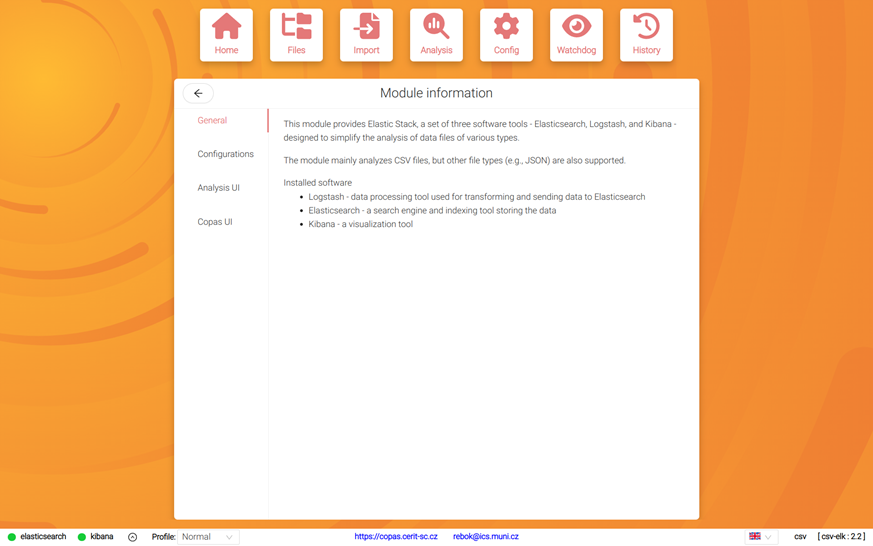
Help Page
A page with information about the module. The page is split into several sections describing different aspects of the module. The sections are fully customizable by the module’s author. Ideally, the help page should have at least the following sections:
- General: Describing the general usage of the module (which file types are supported, the installed software).
- Configurations: Describing the available analytical configurations.
- Analysis UI: Describing the UI for analyzing results.
- CopAS UI: Describing CopAS UI. This is similar across all modules (except the configured parts).
